Maintenance > Envelope Feeder Attachment-D1 (Optional) > Loading the Envelope after Specifying the Size

*
Loading the Envelope after Specifying the Size

Return to Overview


This section explains how to load the envelopes that where specified in Settings/Registration into the envelope cassette.


Remark
  • Make sure that you change the envelope settings from the Settings/Registration screen before carrying out the following procedure. (See "Designating the Envelope Type.") Otherwise, the machine may not recognize the changes you have made.

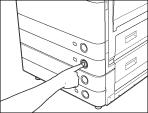
  1. Press and release the button on Paper Drawer 2.

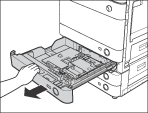
  1. Grip the handle, and pull out the paper drawer until it stops.

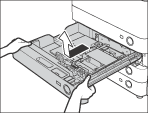
  1. Pull and lift the paper drawer out of the machine by holding its left and right sides with both hands.

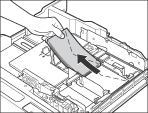
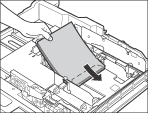
  1. Remove the envelopes that are loaded in the paper drawer (several envelopes at a time).

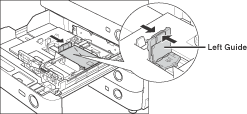
  1. Slide the left guide to align it with the mark for the desired paper size.

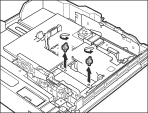
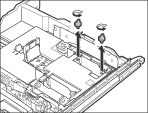
  1. Loosen the two screws fixing the front width guide of the envelope feeder attachment.

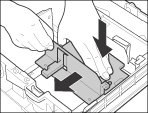
  1. Press down on the envelope receptacle, and move the front width guide to align it with the mark of the desired envelope size.

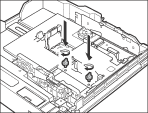
  1. Fix the front width guide in place with the screws.

  1. Move the back width guide of the envelope feeder attachment in accordance with steps 6 to 8.

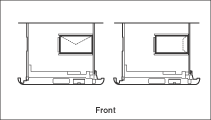
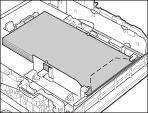
  1. Load 10 envelopes at a time with the side you want to print on facing up. While loading the envelopes, press down on the left side of the receptacle to lock them into place.

Load the envelopes, as shown below.

Align the leading edges of the envelopes, and make sure that they are held in place under the claw.

  • Envelopes which have been rolled or curled must be straightened out prior to use.
  • Make sure that the height of the envelope stack does not fall below the height limit mark ().
  • The maximum height (quantity) of envelopes that can be loaded into the cassette is approximately 30 mm.
  • The maximum height (quantity) of envelopes varies according to the envelope type and user operating conditions, but as a reference, 30 mm is approximately 50 envelopes.
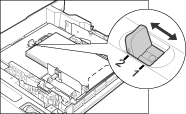
  1. Select whether to use the envelope you set as 'ENV.1' or 'ENV.2'.

  • If you want to use the envelope you set as 'ENV.1':
  • If you want to use the envelope you set as 'ENV.2':

  • If you want to use the envelope you set as 'ENV.1':
  • Turn the paper size dial to '1'.

Doing so enables the envelope size and type stored in ENV.1 in Register Envelope Drawer in Settings/Registration to be loaded.


  • If you want to use the envelope you set as 'ENV.2':
  • Turn the paper size dial to '2'.

Doing so enables the envelope size and type stored in ENV.2 in Register Envelope Drawer in Settings/Registration to be loaded.

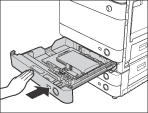
  1. Gently push the paper drawer back into the machine until it clicks into place in the closed position.

  • When returning the paper drawer to its original position, be careful not to get your fingers caught, as this may result in personal injury.
  • Never place paper or any other items in the empty part of the paper drawer next to the envelopes. Doing so may cause paper jams.
  • If output has been stopped due to an insufficient number of envelopes, load more envelopes, and follow the instructions on the touch panel display. Printing resumes.

  • Back To Top