Access Stored Files > Adding a Cover
*
Adding a Cover

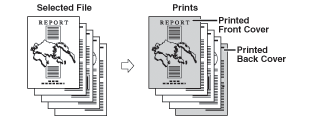
This mode enables you to set the machine to automatically add front and back covers using a different type of paper from that used for the main document. In addition, you can decide whether the front and back covers are printed on as well.


Remark
  • For information on the modes which cannot be set in combination with this mode, see "Combination of Functions Chart."
  • This mode can be used only for printing a file stored in a mail box.
  • If you select the Staple mode when a finisher is attached, you cannot staple more than 30 sheets of A3, B4, or A4R paper, or 50 sheets of A4 or B5 paper.
  • When printing on special types of paper, such as heavy paper or transparencies, be sure to correctly set the paper type, especially if you are using heavy paper. If the type of paper is not set correctly, it could adversely affect the quality of the image. Moreover, the fixing unit may become dirty, or the paper could jam, and a service repair may be needed.
  • If you are printing on the front cover or back cover, these sheets are included in the count of the total number of prints made. If these sheets are left blank, however, the machine's counter does not count them as prints.
  • If you want to set both Add Cover and Insert Sheets or Job Separator, select the same paper size.

  1. Select the desired Mail Box.
  1. Select the file that you want to print → press [Print] → [Change Print Settings] → [Options].
  1. Press [Add Cover].
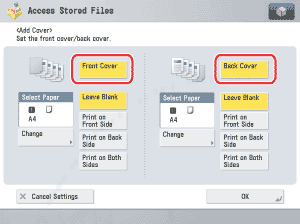
  1. Press [Front Cover] and/or [Back Cover].

  • To cancel a selected feature, press that key again.
  1. Select whether to print on the front cover or back cover → press [Next].
  • If you are using paper that already has printing on it (e.g., company logo) as your front and/or back cover, then you must select [Leave Blank]. Otherwise, the machine will print your original's first or last page on the preprinted paper.
  1. Press [Change] → select the paper source → press [OK].
  1. Press [OK].

  • Back To Top