Maintenance > Tab Feeding Attachment Kit-B1 (Optional) > Loading Tab Paper into the Paper Drawer
*
Loading Tab Paper into the Paper Drawer

Return to Overview


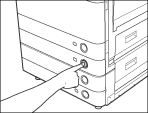
  1. Press and release the button on Paper Drawer 2.

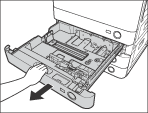
  1. Grip the handle, and pull out the paper drawer until it stops.

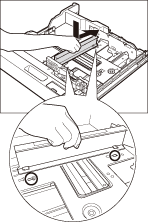
  1. Place the Tab Feeding Attachment Kit-B1 into the holes of the paper drawer, and push it in as far as possible.

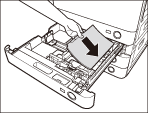
  1. Load the tab paper into the paper drawer.

  • Paper which has been rolled or curled must be straightened out prior to use.
  • Make sure that the height of the paper stack does not exceed the limit mark () at the back of the paper drawer.
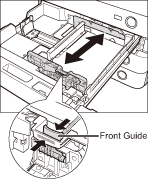
  1. Squeeze the lever on the front guide, as shown in the illustration. While squeezing the lever, slide the front guide until it fits the tab paper.

  1. Gently push the paper drawer back into the machine until it clicks into place in the closed position.
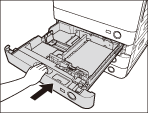
  • When returning the paper drawer to its original position, be careful not to get your fingers caught, as this may result in personal injury.
  • Never place paper or any other items in the open part of the paper drawer next to the paper stack. Doing so may cause a paper jam.
  • When you are not loading tab paper, make sure to remove the Tab Feeding Attachment Kit-B1 from the paper drawer. Using the Tab Feeding Attachment Kit-B1 for storing paper other than tab paper may cause a paper jam.
  • When you load tab paper, make sure to register the paper type. (See "Registering the Paper Type for the Paper Source".)

  • Back To Top