Access Stored Files > Collating Prints > Page Order (Staple)

*
Page Order (Staple)

Return to Overview


Remark
  • The Staple mode can be set only if a finisher is attached.
  • When printing on special types of paper, such as heavy paper or transparencies, be sure to correctly set the paper type, especially if you are using heavy paper. If the type of paper is not set correctly, it could adversely affect the quality of the image. Moreover, the fixing unit may become dirty, or the paper could jam, and a service repair may be needed.

  1. Select the desired Mail Box.
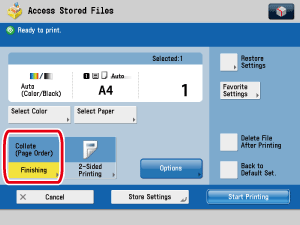
  1. Select the file that you want to print → press [Print] → [Change Print Settings] → [Finishing].

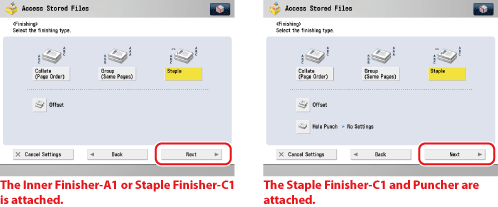
  1. Press [Staple].

If you want to make hole punches, press [Hole Punch].

To print a PDF file with [Hole Punch] set, select the location of the binding holes → press [OK].

  • If the Inner Finisher-A1 or the Staple Finisher-C1 is attached:
  • If the Booklet Finisher-C1 is attached:

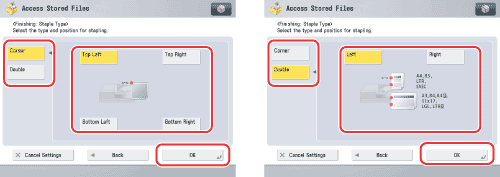
  • If the Inner Finisher-A1 or the Staple Finisher-C1 is attached:
  • Press [Next].

  • Select the stapling type ([Corner] or [Double]) → select the stapling position → press [OK].


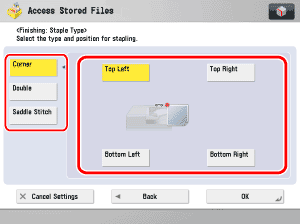
  • If the Booklet Finisher-C1 is attached:
  • Press [Next].
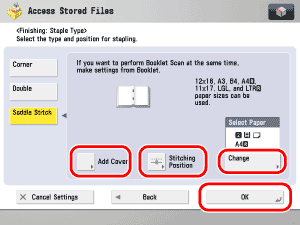
  • Select the stapling type ([Corner], [Double], or [Saddle Stitch]).

If you want to select [Corner] or [Double]:

  • Press [Corner] or [Double] → select the stapling position → press [OK].

If you want to select [Saddle Stitch]:

  • Press [Saddle Stitch].
  • Press [Change] → select the paper source that contains the paper you want to use for the main document → press [OK].

If you selected the paper to use for the main document from [Change MP Tray Paper], select the paper size → press [Next] → select the paper type → press [OK].

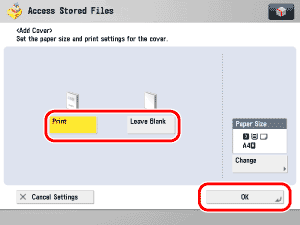
  • If you want to add a cover, press [Add Cover].
  • Select whether to print on the cover → press [OK].

  • Press [Change] → select the paper source that contains the paper you want to use for the cover → press [OK].

If you selected the paper to use for the cover from [Change MP Tray Paper], select the paper size and press [Next] → select the paper type and press [OK].

To change the position of the saddle stitch, press [Change Stitching Position] → select the paper size → adjust the position → press [OK].

  • Make sure to use the same paper size for the cover and the main document.
  • If you select [Leave Blank] for <Add Cover>, [Heavy 1] and [Heavy 2] can be selected.
  • Only 52 to 105 g/m2 paper can be used for the main document, and 52 to 256 g/m2 paper can be used for the cover page.
  • If you are setting the paper for the cover page in the drawer, you must load the paper face up.
  • If you are setting the paper for the cover page in the multi-purpose tray, you must load the paper face down.
  • If you press , the detailed information of selected paper is displayed.

  1. Press [Start Printing].

  • Back To Top